How to Propagate Monstera Plant?
I know Chanda and I have talked to you about succulents, lavender, and propagation in general. As you can see, we really love plants… and especially sharing them.
Perhaps it’s similar to the joy of a new baby; a new plant baby is just a beautiful thing. (Yes, I have compared a plant baby to an actual human baby—I’m allowing myself to do so now that I have a 7-month-old myself…) But whether you have a human baby or not, I think we can both agree that plants enhance homes.
They add color, texture, and life. One of my favorite plants is my Monstera Deliciosa (also known as the Swiss cheese plant). I love its large leaves, I love the pop of bright green it brings to my kitchen, and now I love it even more after propagating it to liven up my living room and bathroom.
First, you might be wondering, wait, I have to keep my precious plant alive, how do I do that? Here are some tips for Monstera care.
Light: Keep in mind this plant’s origin: it screams tropical! That means these plants are used to bright, indirect light. If you can maintain moderate filtered light, they’ll be happier; you’ll notice they grow towards the sun—so be sure to rotate these beauties so your plant doesn’t end up sideways.
Water: Once again, think of the rainforest. These babies don’t enjoy dry soil, so be sure to keep it moist and even mist it occasionally. In fact, did you know that the purpose of those slits and holes in the leaves is to allow rainwater to seep through? Now that’s water!
Care: Be sure to dust those beautiful large leaves from time to time so that photosynthesis isn’t affected. Simply dampen a microfiber towel with water and gently stroke your plants.
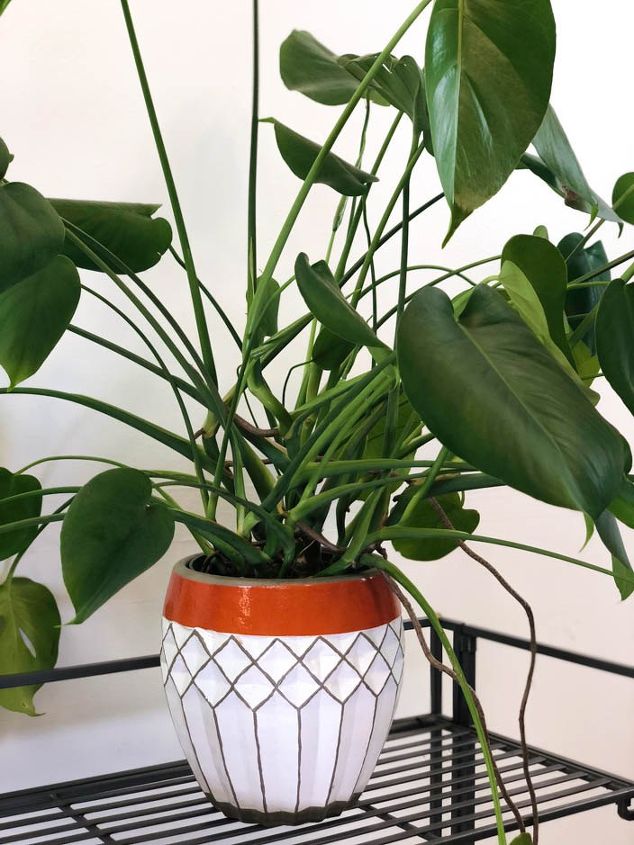
And now for the moment you’ve been waiting for: how to propagate a Monstera plant…First of all, do you see those long, brown aerial roots coming out of my plant? Those roots are looking for something to grab onto and start wrapping, climbing, and growing—I have to love rainforest plants!
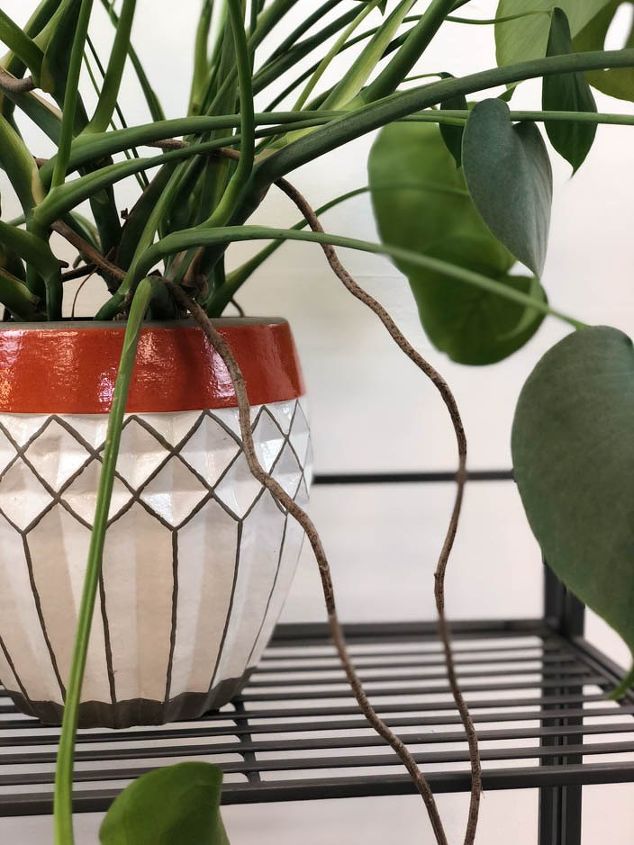
Even if your plant doesn’t have aerial roots, you can propagate it.
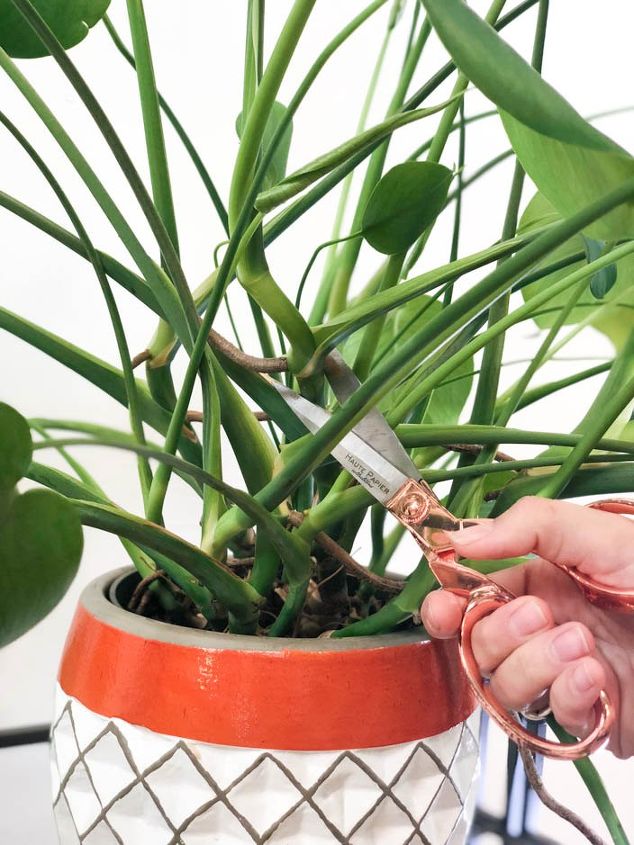
Simply take a clean pair of scissors and cut just below the plant’s node. It’s important to cut below the node to ensure this new plant can thrive on its own. I’m fortunate enough to already have a root there, but normally you cut below this node, and this is where a root would grow.
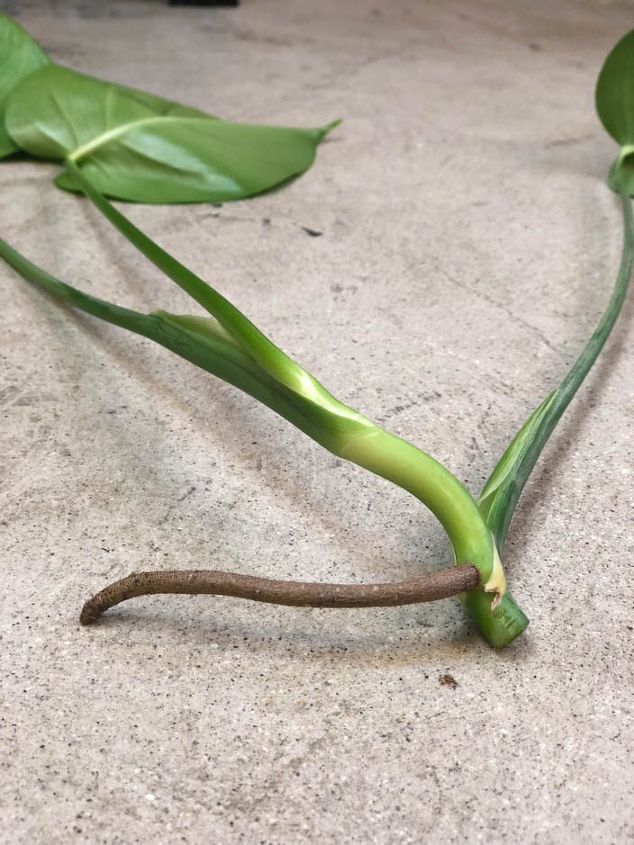
Voilà! Simply place this cut in a glass of water and put it near indirect light, then be patient.
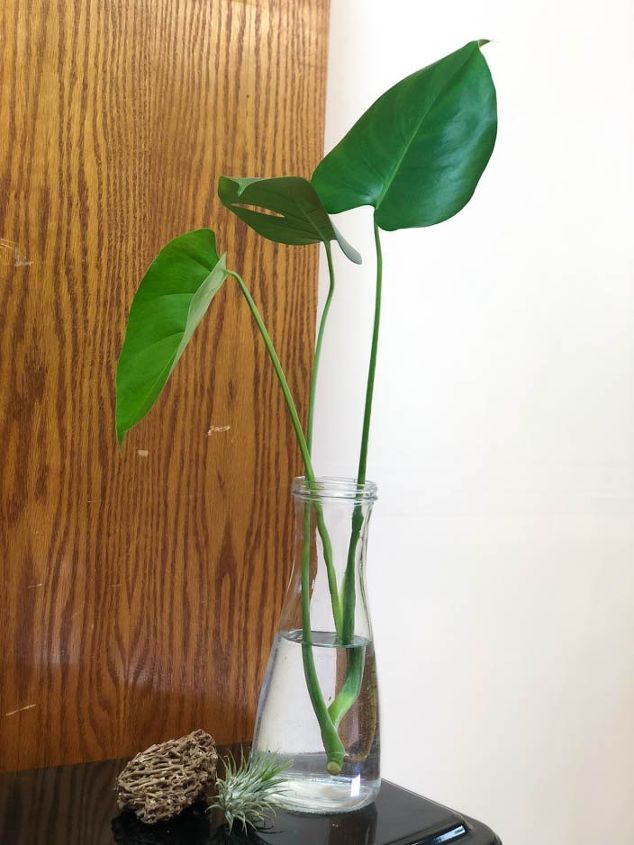
I suggest using filtered water and indirect light to reduce any algae problems that might occur. Also, be sure to change the water every few days if it becomes cloudy—we want our baby to grow!
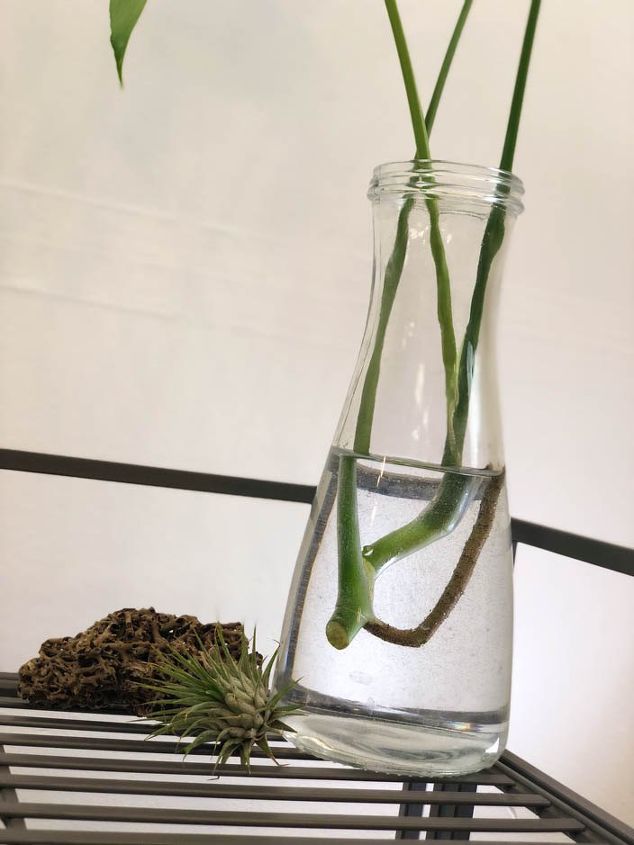
Once it has some established roots, feel free to plant your new plant in moist potting soil.
Enjoy!