How to Grow an Avocado from Seed at Home?
Turn a simple avocado pit into a beautiful, free houseplant with this easy, step-by-step guide. From the classic toothpick-and-water method to planting and caring for your new green friend, this covers everything you need to know to get started. #GrowAvocado #AvocadoSeed #HouseplantDIY #KitchenGarden #PlantParent
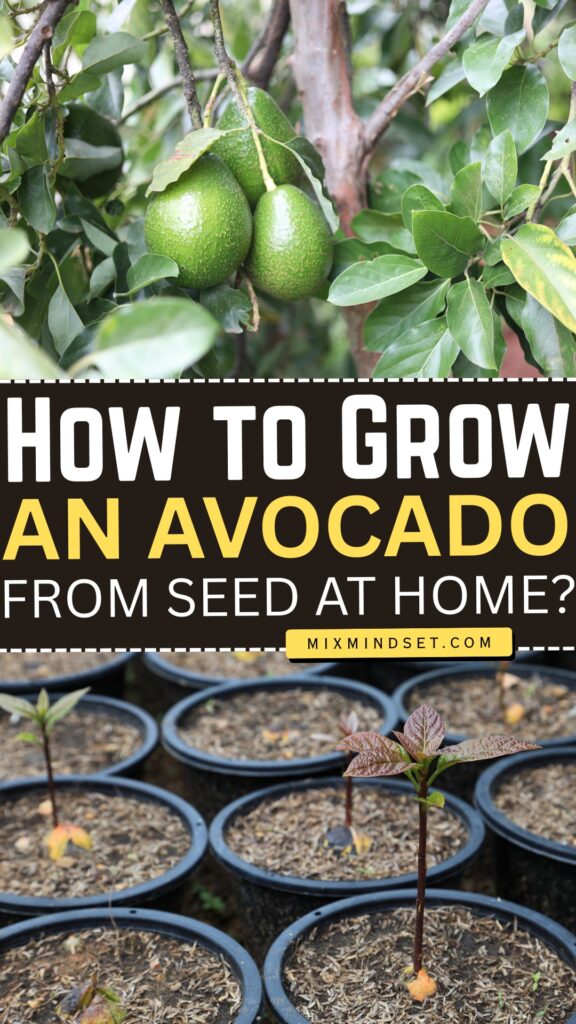
A few years ago, I found myself staring at an avocado pit, wondering if the old internet trick actually worked. I had seen pictures of avocado trees grown from seeds, but I was skeptical.
Could something so simple really produce a plant? I decided to find out. I followed the classic toothpick method, placed the jar on my windowsill, and waited. Weeks went by with nothing but cloudy water and a stubborn pit.
I was about to give up when I noticed a tiny crack forming at the bottom. Then a root appeared, followed by a stem, and eventually, a small leaf. That first little sprout felt like a victory. Since then, I’ve grown several avocado plants, and each one still feels like a small miracle.
The avocado seed, or pit, is a large seed that can be sprouted into a new plant. While it’s unlikely to produce fruit indoors or in colder climates, it makes a lovely, free houseplant.
The most common type of avocado is the Hass variety, which is smaller and more tolerant of indoor conditions, making it a great choice for this project. Here is everything you need to know to grow your own.
What You Will Need?
Step-by-Step: The Classic Toothpick and Water Method
This is the most popular and fun way to start an avocado plant. It’s an easy and engaging indoor project.
Step 1: Remove and Clean the Pit
Carefully cut the avocado in half lengthwise and twist to separate the two halves. Gently remove the pit and rinse it thoroughly under running water to remove any remaining fruit flesh. Be careful not to remove the brown skin, as this is the seed coat.
Step 2: Identify the Top and Bottom
Hold the pit with the pointy end facing up and the broader, flatter end facing down. The broader end is where the roots will emerge.
Step 3: Insert the Toothpicks
Insert three or four wooden toothpicks into the sides of the pit, about halfway up. The toothpicks should be inserted firmly and evenly around the seed’s “equator”. These will act as little “crutches” to hold the pit on the rim of your glass.
Step 4: Suspend the Pit in Water
Place the pit on top of a clear glass or jar, with the toothpicks resting on the rim. Fill the glass with water so that the bottom half of the pit is submerged. The top half should be above the water.
To do this, you can use a glass with an opening wide enough to hold the pit, but not so wide that it falls through. Ensure the broad end is in the water.
Step 5: Place in a Warm, Bright Spot
Set the glass in a warm spot with bright, indirect light, but out of direct sunlight. A sunny windowsill is a great spot. Make sure the water level is maintained so the bottom of the pit remains submerged.
Step 6: Change the Water Regularly
Change the water every two to three days to keep it fresh and prevent bacteria from growing. Stagnant water can lead to mold and rot.
Step 7: Wait for Roots and a Stem
This is where patience comes in. It can take anywhere from two to six weeks for roots to sprout from the bottom of the seed. A stem will emerge from the top shortly after.
The pit may split and its outer layer may crumble away; this is completely normal. If nothing happens after two months, the seed may not be viable, and you should try with a fresh pit.
Step 8: Prune the Stem (Optional but Recommended)
Once the stem reaches about 6 to 7 inches tall, cut it back to about 3 inches. This may sound counterintuitive, but it encourages the plant to develop a stronger stem and a more robust root system before it’s planted in soil. This step also encourages bushier growth.
Alternative Method: Starting an Avocado Pit in Soil
You can also skip the water and toothpicks and plant the pit directly in soil. Some find this method even easier.
How to Do It
- Choose a small pot (about 8 inches) with good drainage and fill it with well-draining potting mix.
- Plant the pit with the broad end down and the pointy end up.
- The top third of the pit should be exposed above the soil.
- Place the pot in a sunny window and keep the soil moist, but not soggy.
- Germination can take several weeks.
Planting Your Sprouted Avocado in Soil
Once your avocado pit has developed a strong root system (roots are a few inches long) and a healthy stem with leaves, it’s time to move it from water to soil. This transition is important for its long-term health.
Step 1: Prepare the Pot. Choose a pot with a drainage hole. A 6- to 10-inch pot is a good starting size. Fill it with a well-draining potting mix.
Step 2: Plant the Seed. Carefully remove the toothpicks. Plant the seed in the center of the pot, leaving the top half or tip of the seed exposed above the soil. Burying the entire seed can cause it to rot.
Step 3: Water and Place in Bright Light. Water the soil well. Place the pot in a spot with bright, indirect light. A spot near a sunny window is ideal.
Caring for Your Avocado Plant
Light
Avocado plants thrive in bright, indirect light. They need at least six hours of bright, indirect light per day. A south-facing window is often a good choice.
Watering
This is a common area for mistakes. Avocado plants dislike both soggy and bone-dry soil. Only water when the soil is completely dry. To check, stick your finger about an inch or two into the soil. If it feels dry, it’s time to water.
When you do water, water deeply until it runs out of the drainage hole. Reduce watering in the winter months. Overwatering can cause curled leaves and soft stems, while underwatering will cause wilting and dried leaves.
Soil
Use a light, well-draining potting mix. A mix of regular potting soil with perlite or coarse sand is ideal. A clay or terracotta pot can help maintain a healthy root system.
Fertilizing
Avocado plants benefit from occasional feeding. Fertilize every four to six months with a balanced, slow-release fertilizer, or a product formulated for citrus, mango, and avocado plants. Look for a ratio like 4-6-4, 5-5-5, or similar.
Pruning
As your plant grows, prune the shoots back, cutting just above a lower leaf. This encourages fuller, bushier growth.
Troubleshooting and Realistic Expectations
The Bottom Line
Growing an avocado from a seed is a wonderful and rewarding project. It’s a great way to create a free houseplant from something you would otherwise throw away. The process is simple, and watching the roots and stem slowly develop over the weeks is a satisfying experience.
My first avocado plant sat on my kitchen windowsill for years, a constant reminder of that first tiny root breaking through the pit. It never produced a single avocado, but it didn’t matter.
It was a beautiful, living plant I had grown myself, and that was enough. Even if your plant never fruits, you’ll have a lovely, unique houseplant to enjoy for years to come. Start with a pit, a glass of water, and a little patience, and see what you can grow.